Lockdown has rekindled my love for paper


Part 1. How did I fall in love with paper?
At the start of lockdown, my life was completely paperless. To my surprise, as more and more of my day transitioned into pure digital because of COVID, the lack of physical experiences started to show.
This is how boring paper has found its way back into my life, just as everything else got converted into excited pixels.
What do my screens that can do anything lack, and that paper has plenty of? Limitations. Let me tell you what I mean.
Paper is boring and slow, but deliberate and permanent.
There are no tools, no searching, no copy-pasting, no spell-checks, not drag-and-drop. You just have to deal with the fact that putting ink down is slow. And that’s great. It makes you think about what and how you chose to capture.
It encourages me to synthesise to the core message, simplify and be clear enough to understand what I meant weeks and months after writing. Trust me, you will need to understand it because, unlikely with most digital notes, I found myself shuffling through the pages of my notebook more often than ever – holding something nice in your hands is a satisfying experience.
It’s only one page at a time, but endless within that perimeter
In a world of notifications and distractions, of pop-ups and vibration, a new page is always completely silent.
Just a canvas, ready to be filled in any direction or way I please. It’s potential energy at its finest. I can ink it, write it, scribble it. I can rip a corner from it. I can choose to stay within the lines, or I can just go crazy. I can make this page truly unique – more unique than any digital can be. I can make this page truly mine.
It’s tremendously imperfect, but so is my imagination
Wrinkles, textures, shapes, marks. Stains. Folds. Crises. Lines that are not quite straight. Little smudges. Some imperfections. Some doodles.
Some mindless scribbles during some mindful wanders. If I have a piece of paper in front of me, I often find myself doing something to fill it. Not consciously – effortlessly. And, as if through magic, a lot has emerged over time from what it looked (and felt) like just a mess.
The already dirty/ imperfect canvas inspires me to stop holding back, to stop waiting for the perfect moment. Starting without knowing where I’ll end seems fine. However, ironically, between you and me, the truth is that once I start, the idea/ design takes over and drives me, instead of me driving it.
My torrential frenzy to create will inevitably end in cuts, strikes, lines crossed, ugly shapes, a lot of mistakes. But, often, it’s precisely these mistakes that give me the right answer to my problems.
Part 2. How I use paper?
I’m a professional working in a (home) office environment. Each of my days starts with a list of the things I’m planning on achieving (see how I schedule things and sometimes, actually manage to achieve them). I do this on paper, looking at my notes from the previous day before I log into any laptop or check my phone.
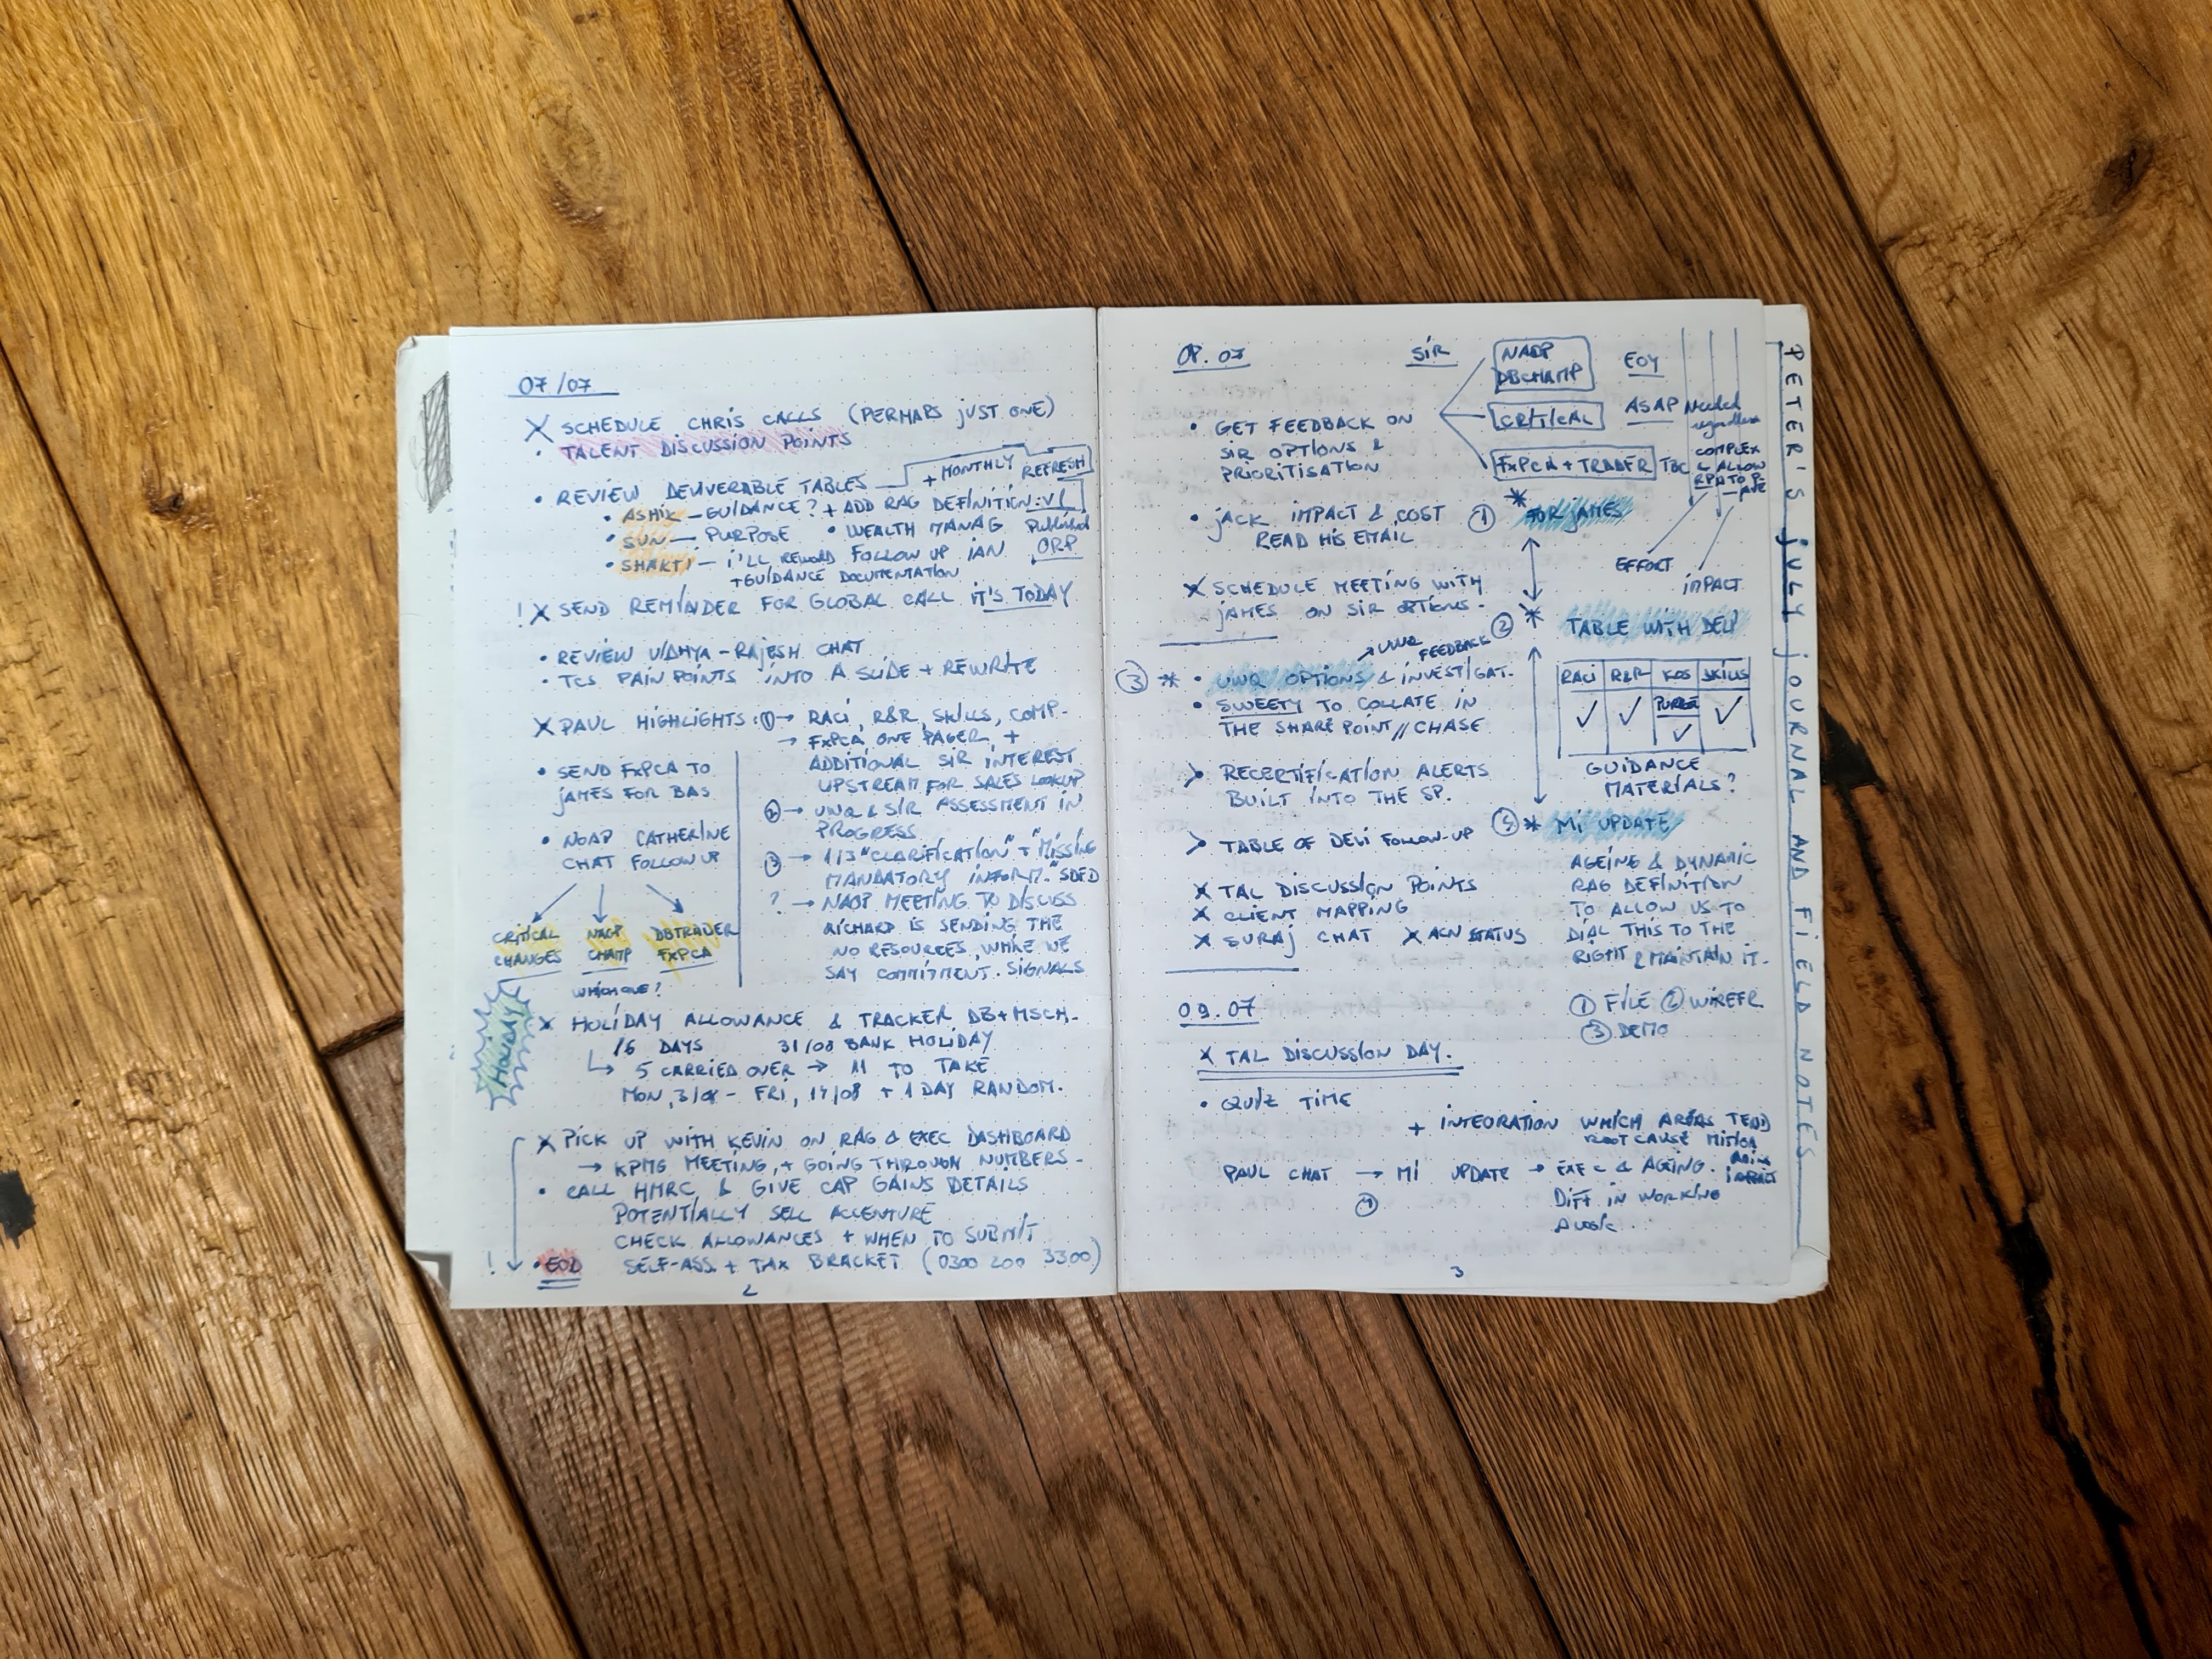
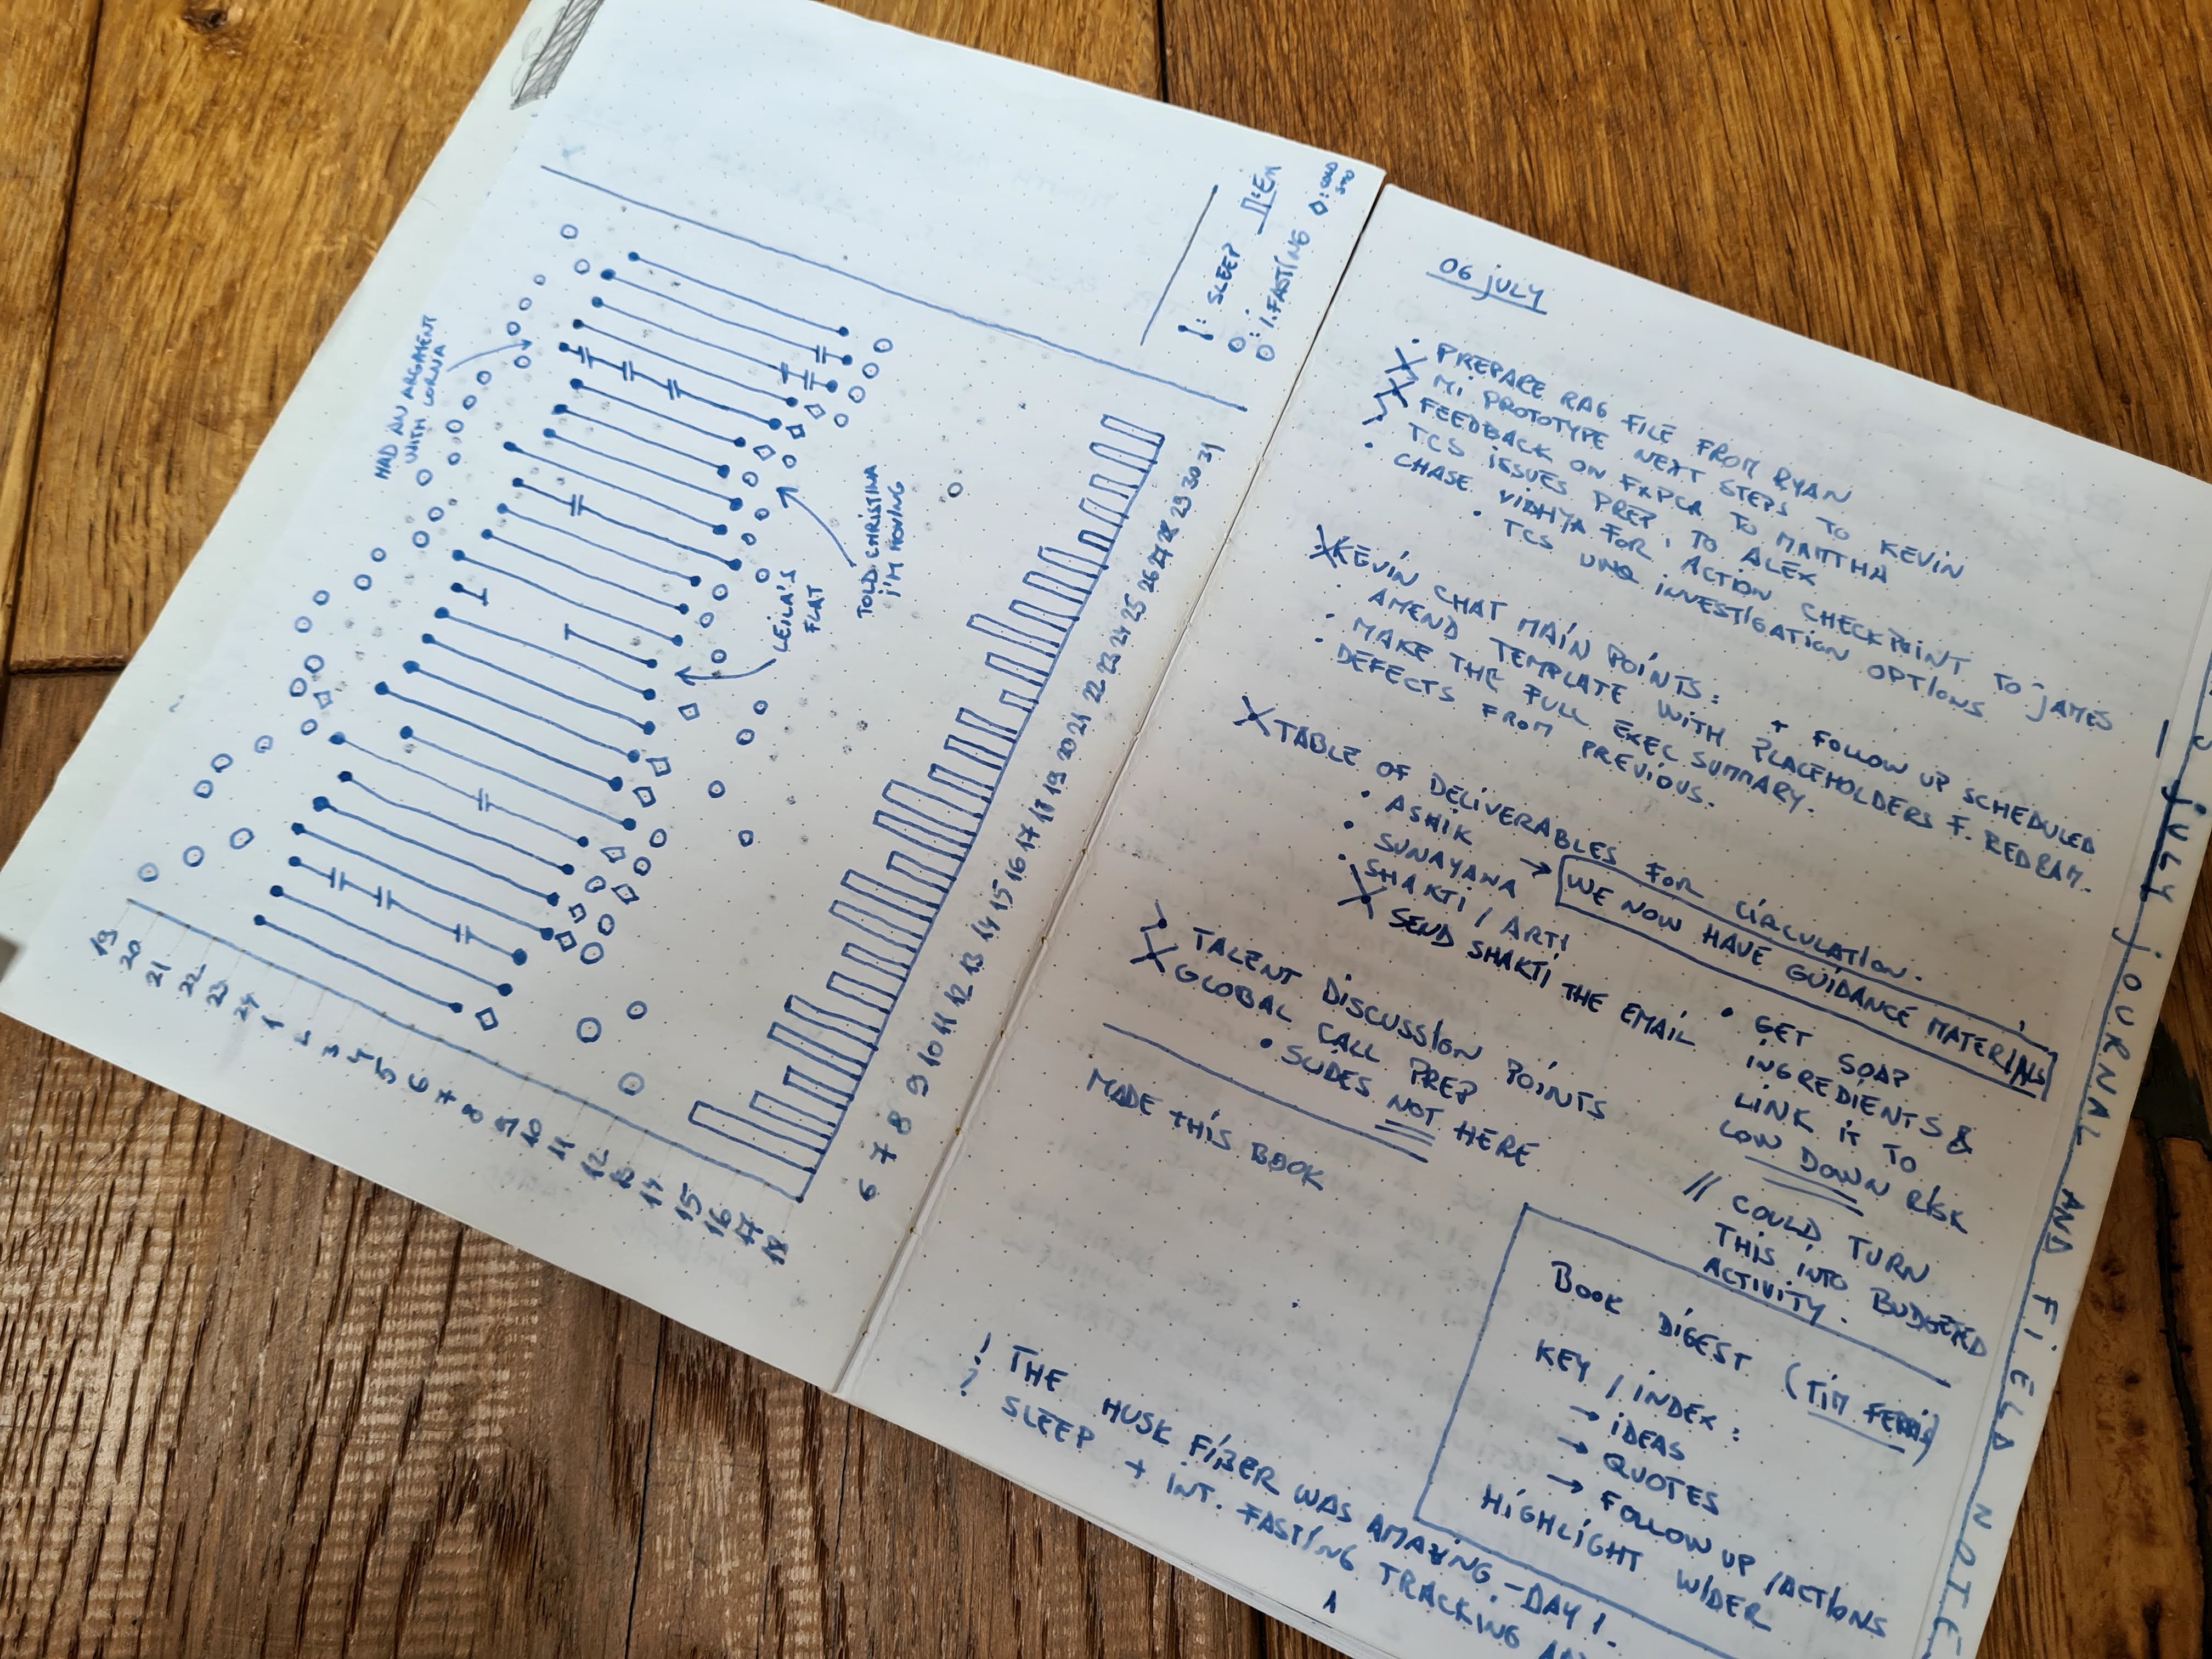
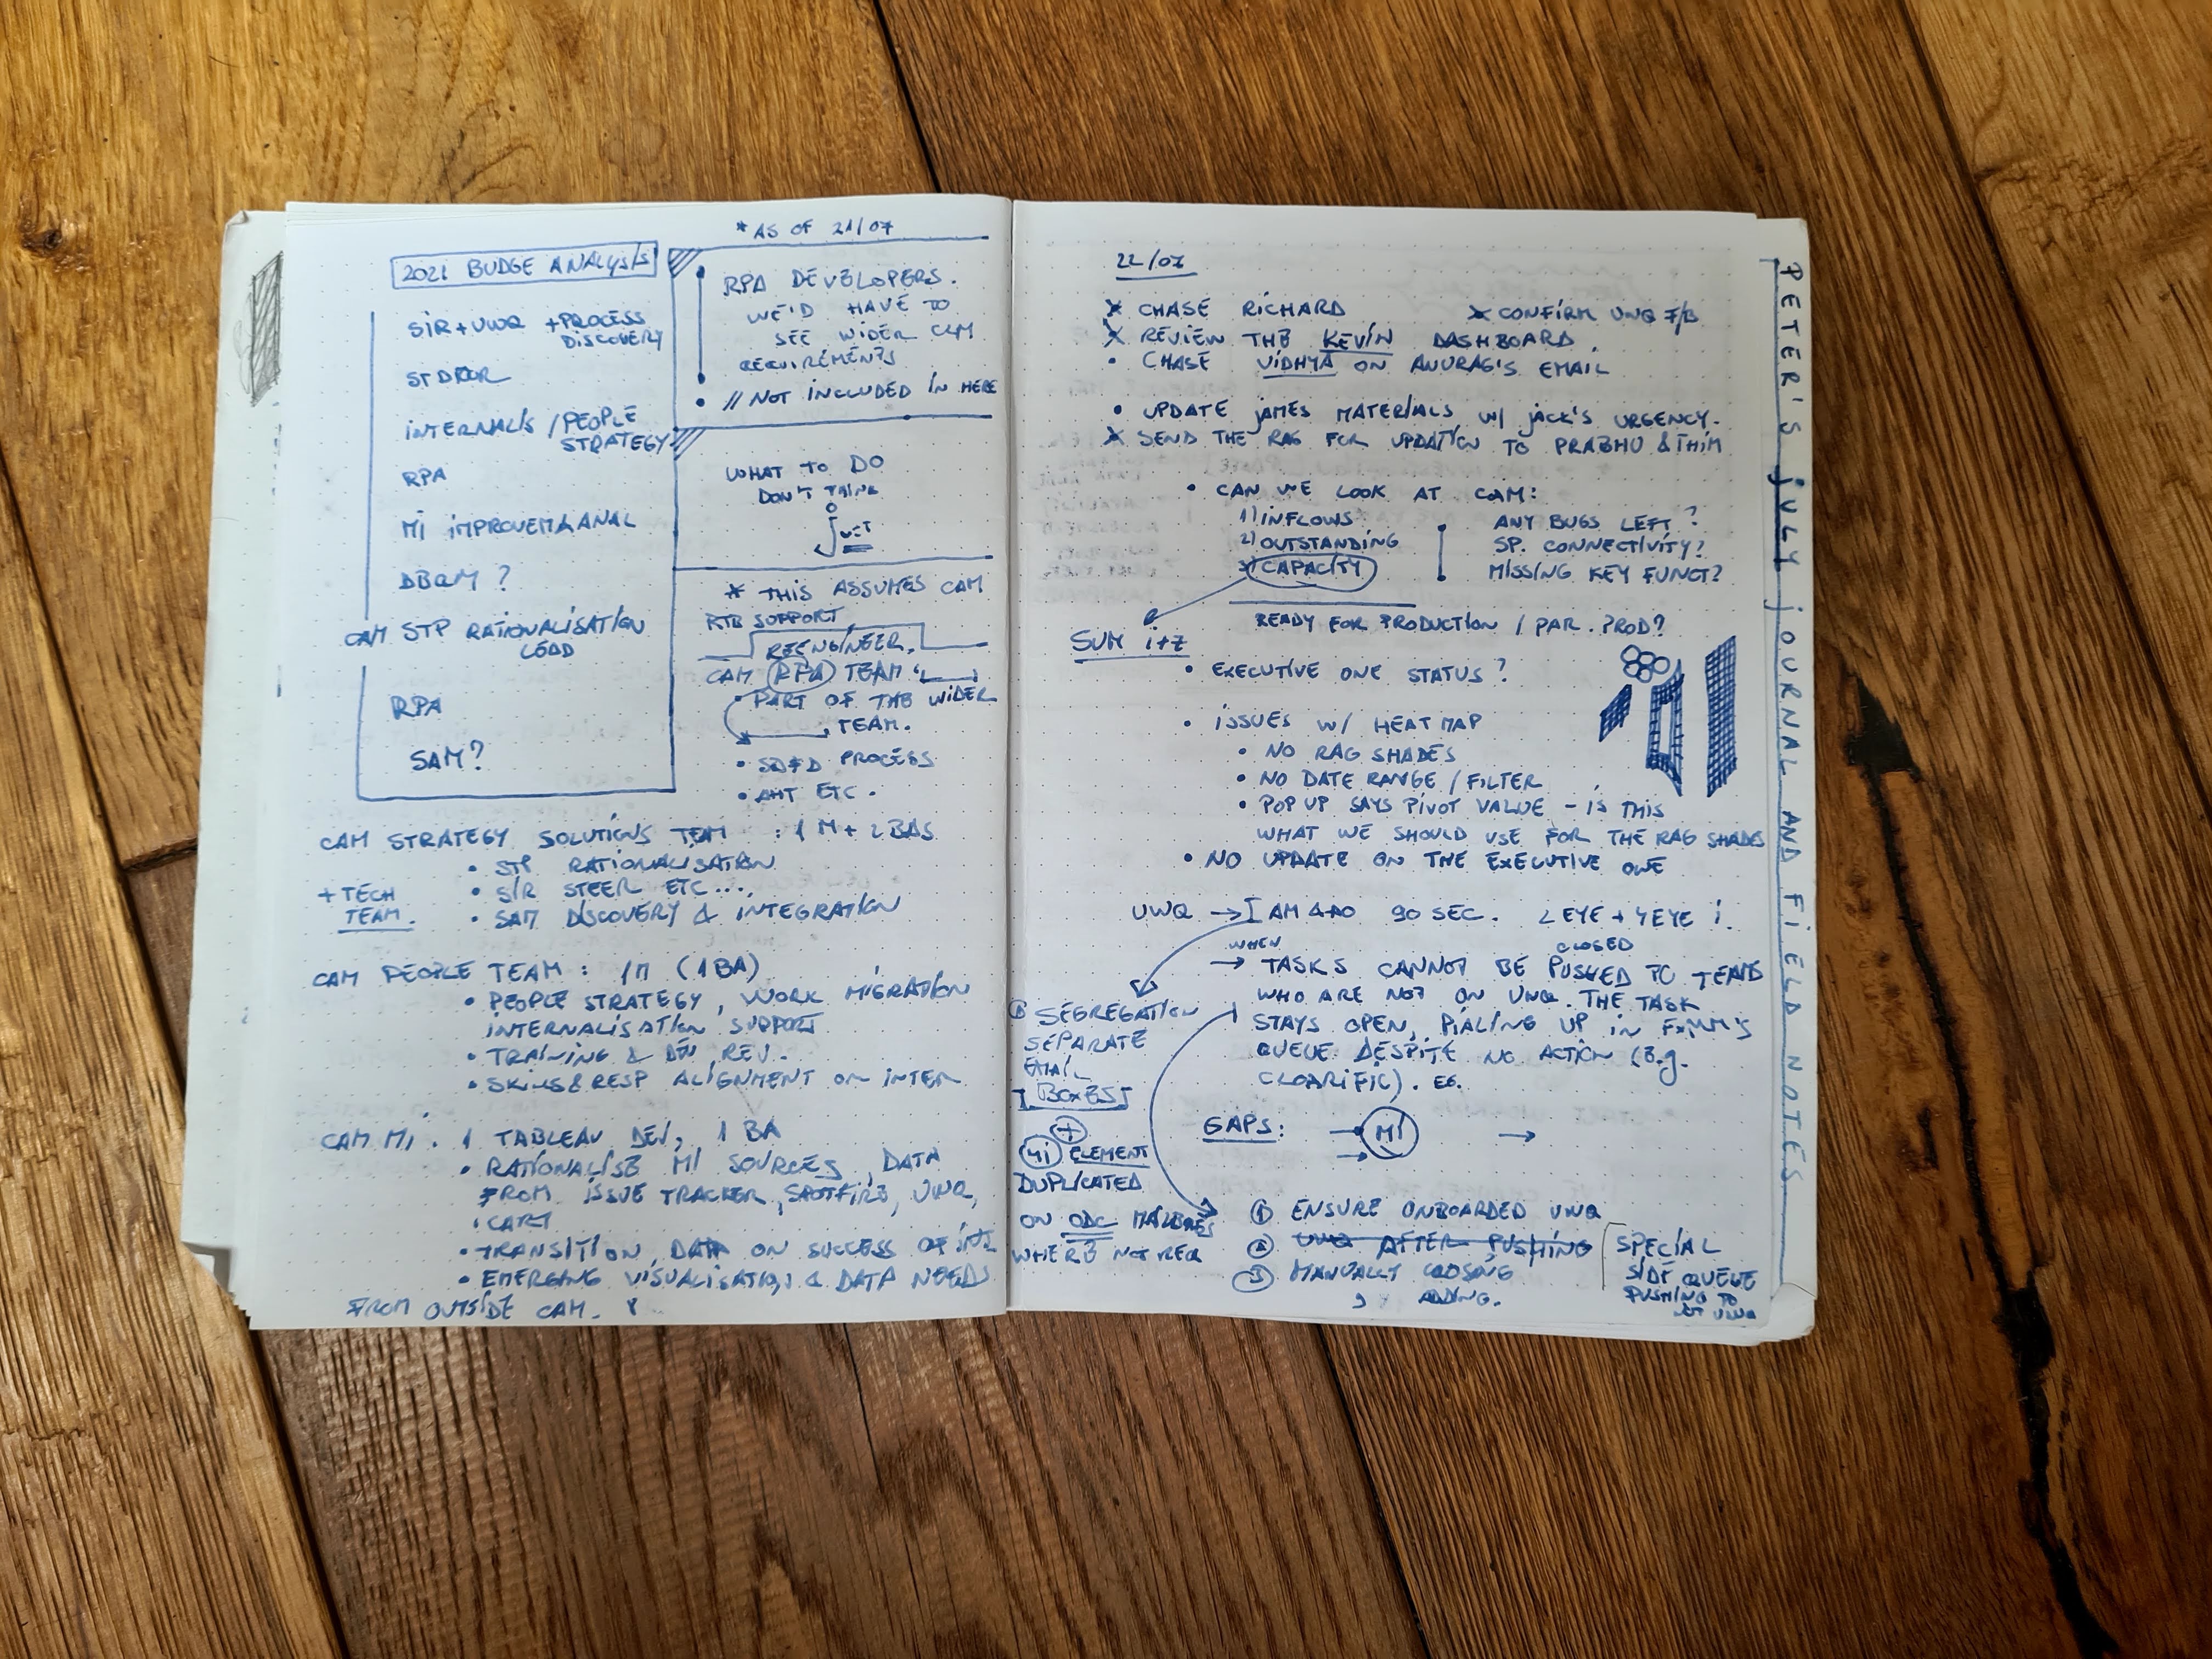
During the day, I attend and chair many meetings. My notebook is where I take notes, doodle, record actions and ideas. I use a very rudimentary notetaking convention, inspired by a simplified bullet journal (see photo – that’s basically giving you the whole thing).
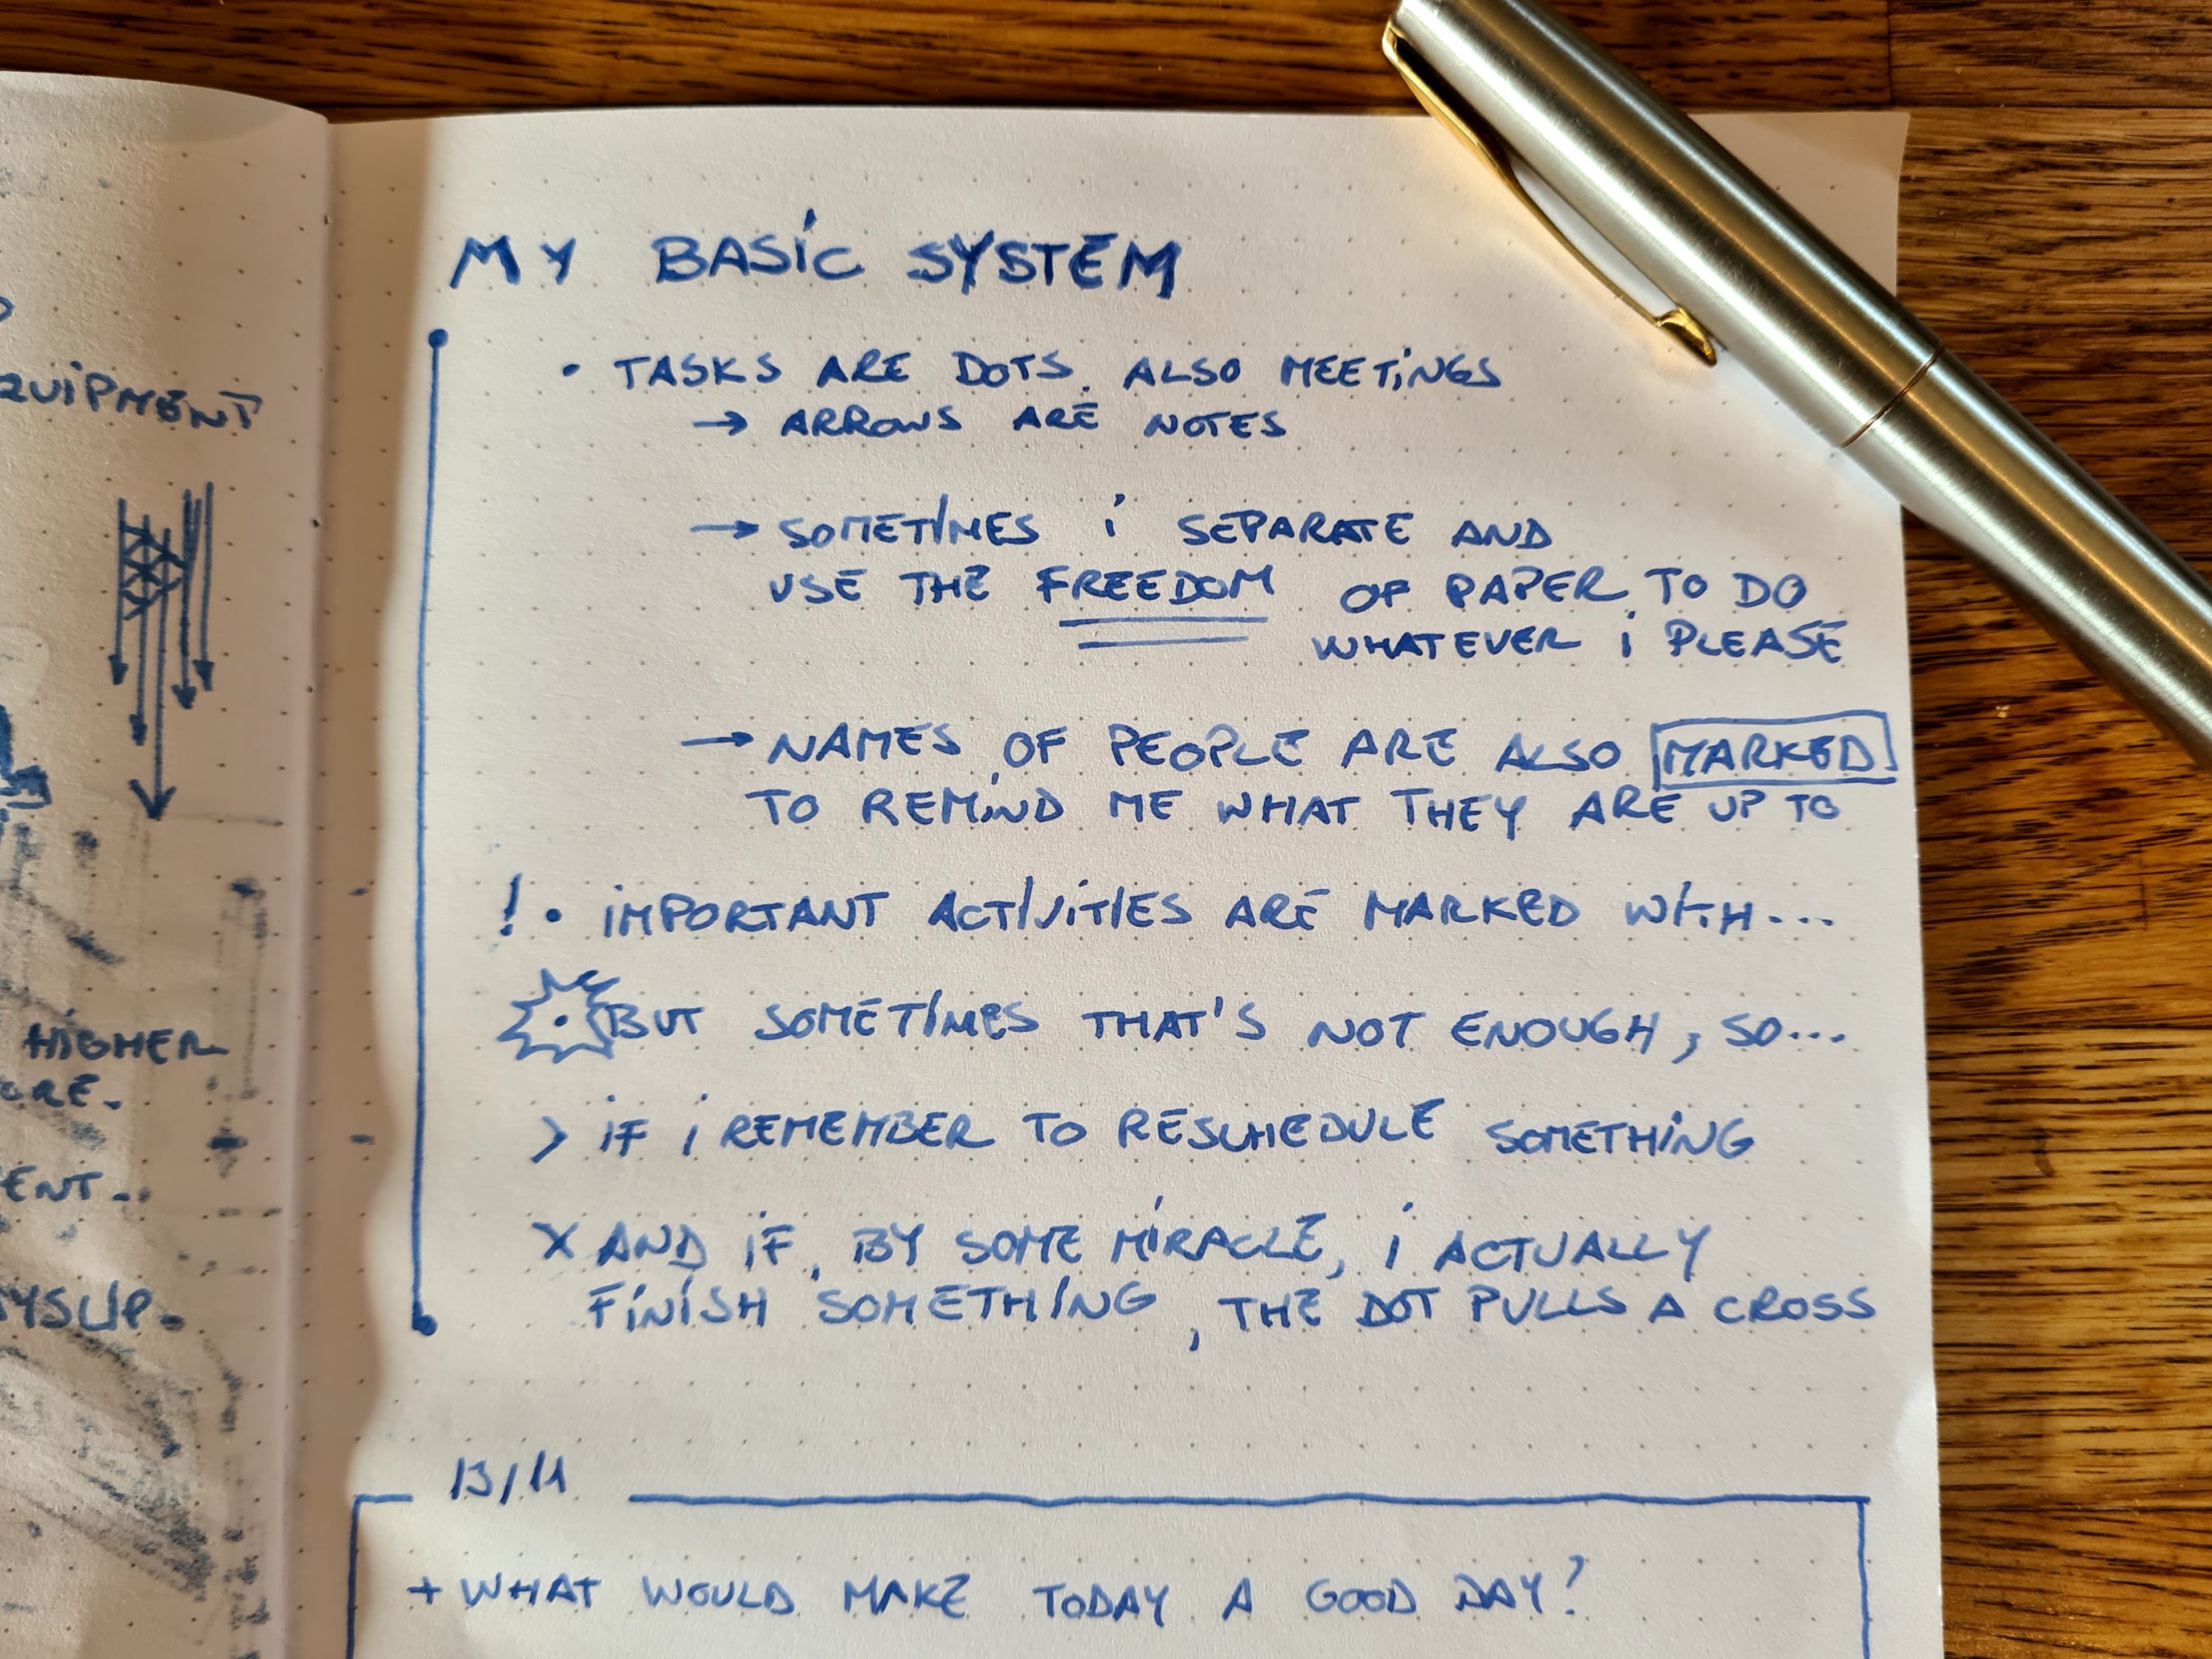
Bullets are for task/ item, which turns into a cross when it was completed. Exclamation mark next to it when it’s something super important.
To keep things interesting, I highlight, colour, emboss. I have no system for how I use these embellishments, and it’s great. Part of the joy of having a notebook is the freedom that comes with it – don’t prescribe the fun out scribbling like a child! You can do whatever you want, and it’ll work.
Often I sketch. A dashboard wireframe, a process flow, a new slide design, a diagram. Sometimes I keep track of things. My habits. Project deliverables. Weekly status reports. Progress on my learning goals.
Note this is not my second brain. for that, there are other models I use, to encode information for efficient retrieval (let me know I you want me to share how I do that – will be happy to help).
Part 3. Key takeaways
There’s an interesting dialogue in Margin Call that stuck with me.
John Tuld: You’re one of the luckiest guys in the world, Sam. You could have been digging ditches all these years.
Sam Rogers: That’s true. And if I had, at least there’d be some holes in the ground to show for it…
Margin Call – final Act.
I have always interpreted that as a natural longing for physical impact – something beyond the digital castles in which we invest so much. Lockdown has reminded me of how simple it is to connect with myself via paper.
It’s slow, limited, imperfect. It’s the perfect companion for the equally flawed, human me.
Next time you’re stuck on a call, try leaving a clean sheet of paper in front of you and see what happens!

Bonus Part. My notebook of choice
Given my use cases, I want nothing to get in the way (e.g. over-engineered and over-designed). I want something as clean as possible and as close to pure paper as possible to allow me to connect with myself. Nothing more, nothing less.
So, instead of buying something that I’d be only partially happy with, I started making my own notebooks. Here’s what I do to get the perfect thing for myself (all under $1/ £1).
Step 1. Find a template and print it double-sided on 13 sheets of paper
I use a graph paper template of dots classic, generated for free by this website. The settings I use are:
- Grid dots template
- Dot size: 0.5 points
- Grid spacing: 2 dots per CM (metric system, I know!)
- Colour: #B3B3B3
- Paper size: A4 (you can change the paper size by clicking on the icon – you should pick the type f paper you’re printing on)
I print that on 13 sheets of paper – I found that to be just the right size when bent into an A5 notebook. It gives you 56 pages, ready to be filled with ideas!! This usually and conveniently lasts me for about one month.

Step 2. Sewing the sheets into a notebook-ish
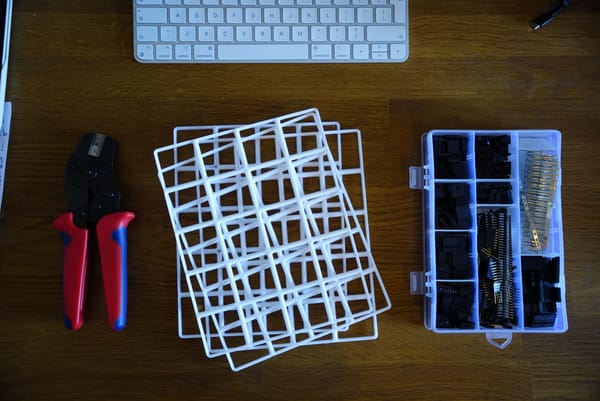
I’m no artist and use whatever I still have from an old sewing kit acquired during my days of travel across hotels for business (pre-COVID life was so wild).
I use coloured thread which I double up to make it more sturdy. Because I double the thread, I found that cutting 5-6 times the width of the notebook works well. For my A4 paper creased into an A5 notebook, that’s around 1 meter of thread. I align the paper, stack it and pinch it with stationary clamps. I mark the places I want to sew through in pencil and push through them with a fork/ kebab stick.
This is the pattern I sew – I’m sure it can be optimised, but it works for me (simple and sturdy). One thing I constantly forget is to tie the starting knot at least 10 cm from the end of the thread (otherwise, it’s such a pain to tie up once the whole sewing is complete).
Step 3. Making my layout
I use my front page as the cover, nothing fancy. I number the notebook just in case I need to reference it, and I also number each page because there are a few situations where I had to come back to previous ideas.
I leave the inside cover blank because this will eventually become my index (anything worth keeping as I progress through the notes will be referenced here with the page number and title) And that’s my whole process. Who thought that going completely bespoke can be so easy and rewarding.